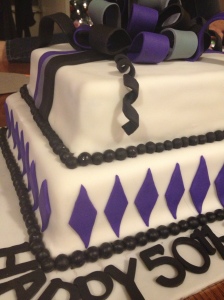
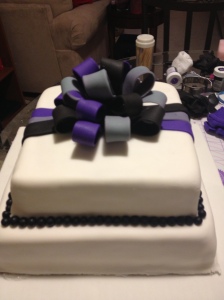
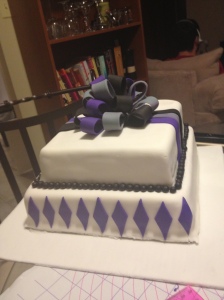
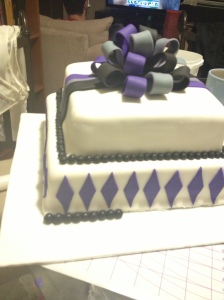
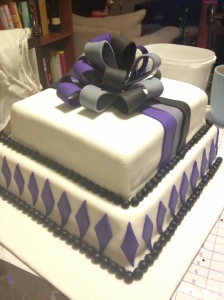
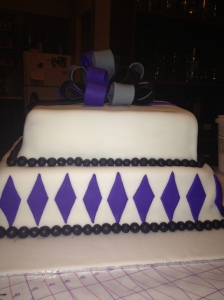
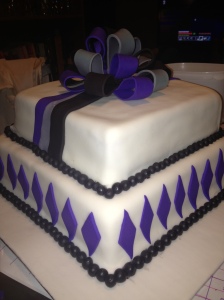
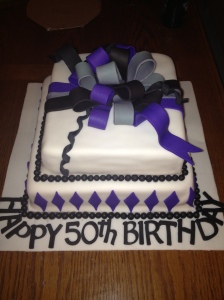
I created my first two-tiered cake! Not without struggle might I add. After 8 hours of baking, frosting, kneading, rolling, covering, pressing, measuring and gluing, I created my tiered masterpiece! Okay, it’s not a masterpiece. It’s more like…a two-tiered minorpiece…haha get it? …cause it’s… not a master?… hehe… So anyways. The hardest thing about this cake, and all other cakes I’ve made, is the actual “frosting” part. I often find it difficult to evenly frost a cake and prepare it for a layer of fondant. This was particularly difficult with a square cake…corners will be the death of me! I had no trouble frosting my NASCAR cake, but, it was circular – no corners. Also, the reason why it took me sooo long to bake the actual cake (like 2 hours, honestly) is because I only had one type of pan for each layer…I suppose I could have organized myself better…but it turned out so it’s all good. So my cake was a double layer two-tiered cake, iced with a basic buttercream frosting and covered in white fondant. The cake had a small black fondant ball border and purple accents. I topped the cake with a purple, black and grey bow, and added ribbon accents. I placed the cake on a fondant covered board, and added black lettering to it for the birthday couple!
Overall, I’m happy with how it turned out. I had some trouble stacking the cake because I used thicker cake boards than I should have. There was a space on one corner between the first and second layer, which was…annoying. But I was able to cover it with some fondant and a few black fondant balls. The most annoying thing about this cake was the fact that I could see the little icing imperfections through the fondant. I tried my best to smooth it, but it was just unfixable in some areas. I’m sure a lot of people didn’t notice…. but I sure did and it drove me nuts! Okay, I’m nit picking. So here it is…my first two-tiered cake!
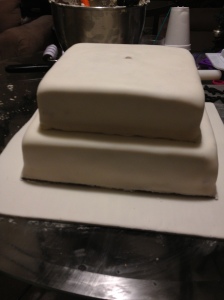
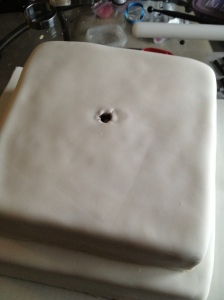
Frost you cake and prepare it to be covered in fondant. If it’s square, make sure that the corners are relatively square, and that the icing is even. This is important when you are covering your cake because if the icing is uneven or “lumpy” it will show through your fondant… especially well rolled fondant as it is thinner. Cover your cakes with fondant. They should be sitting on cake boards that are the exact same size as your cake (i.e. 8 inch cake on an 8 inch board). Now you are ready to dowel your cake. Your biggest cake layer will go on the bottom, and you are going to measure out 4 wooden dowel rods to the height of you cake. In my case, I measured the rods to 2.5 inches. The rods cannot poke out of the top of the cake layer as this will make staking difficult. Press the dowel rods into the cake in the shape of a square. They should be smaller than the layer you are going to place put on top. One the rods are in, you can stack your second tier. I placed a small amount of buttercream between the layers to keep the second tier in place. Once the second layer is secured, measure out a fifth dowel rod the height of both tiers. Mine was about 5 inches long. Sharpen one of the ends of the rod, and poke it through the center of the top layer, through the cake board, and through the first tier to the base. I didn’t really have the patience to “sharpen” my dowel rod, so I poked a hole in the center of the cake board before I put the cake on it and fed it through afterwards.
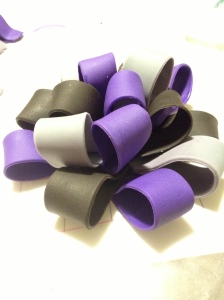
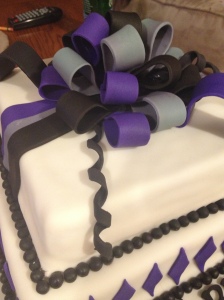
I made a bow with three colours of bow loops – grey, purple and black. You can find a tutorial for a fondant bow here.
Next, I made 1-inch straps of each of the three colours I used for the bow using my fondant ribbon cutter, prepared for 3/4 inch strips. (I know that sounds weird, but if you prepare it to 3/4 inch you come out with 1 inch strips as there is extra plastic on either side of the cutters…go figure)
I then placed the bow in the center of the top tier and began the ball border. I made this by rolling out fondant to 1/8 inch thick, and using the small Wilton fondant circle cutter. I cute out like…..not even kidding…almost 200 little circles, and then rolled them into tiny balls.
Then I started on the triangles…I literally just measure these out and then glued them on. I tried to make them look as similar to each other as possible.
I completed the ball border for the first tied using the billion balls I had already rolled out. Attaching the balls to the cake is simple, but it’s best to do it when they are still soft. The firmer the ball the harder it is to make them stay.
Notice the right corner above…uhhg its the uneven one!!!
The last touch to the cake was to add some ribbon accents. I made the ribbon ends by cutting out 1 inch straps with my cutter. i formed them by laying them over a Styrofoam cup for 20 minutes or so. Note that this fondant had gum paste in it so it dried quickly. I made the curly ribbon by cutting out 1/4 inch strips with the cutter and then wrapping them around a dowel rod for about the same time. The curly ribbons were firm but not so hard that they wouldn’t fall naturally on the cake.
All that was left was to add the letters!
So, it turned out relatively well. One thing I would change is that I think next time I’ll make each tied three layers. I don’t feel the two layers was enough for me to do what I had initially intended for this cake. My goal was to make the top tier a box, with a lid and everything. There wsn’t quite enough room to do it so that’s my challenge for next time.
Beautiful work K…just imagine what you’ll be able to create if we take that special tiered cake class 😉
LikeLike
Oh my, this is so amazing! I like it! =)
LikeLike