Hello Friends! Sorry for the hiatus – I’ve been focusing on finishing my semester. Come March I will be done until June… woohooo!! It’s been a little over a month since adopting a new, healthy lifestyle, and I have to say it’s much easier to do than what I remember (well, sort of… the workouts not so much). I remember feeling grumpy when I would watch my friends eat their grease smothered pepperoni pizza, with the cheese pulling off in a long string as though it was straight out of a 90’s cartoon (you know the one)… and the smell, it made me drool. I wanted to wear it as a perfume. I scowled as I stared down at my dry and tasteless lightly seasoned chicken breast and side salad (dressing on the side, of course). I was dreading this transformation. Of course, I am completely capable of cooking a from scratch, preservative free meal. But low calorie? Unless we’re talking chicken and salad or baked salmon and steamed carrots I’m at a loss. I’ve done TONS of healthy meals in the past, but they’ve never really tasted AMAZING. Like I wouldn’t make it for a group of people and expect them to fall in love with my culinary skills. So I’ve been experimenting, and trying to make some of my favourite meals and favourite tastes into something a little less… calorie dense, and I’ve also been looking for healthier recipes from cookbooks (like actual cookbooks… weird, right) and bloggers (the healthy kind). I’d like to share some of the new recipes I have tried… they’re REALLY yummy. And just give an update and what I’ve been eating. I’m far from perfect… hey, I’m a foodie. It’s tough to give up some things, but I’m trying and that’s all that matters, right?! Right.
First, lets start with a Spicy Thai Stir Fry. I love this dish so much. It was inspired by a a local restaurant – Sizzles, which is a Mongolian-style “build your own stirfry” grill. SO tasty. I try to hit it up a few times a month. For this dish a sauté sugar snap peas and red peppers in a large skillet with olive oil and my favourite cooking sauce (which is Thai, it’s SOOO good – I am on the hunt for a light version). I usually use about 2 tbsp in the skillet. In a separate skillet, I cook about 10 oz. of chicken strips in a tad of water and 1 tbsp of the cooking sauce. Cover and cook on medium, stirring and flipping every few minutes, until chicken is cooked through. Place 1/2 – 1 cup of gluten free or whole wheat pasta on a plate, top with half the veggies and half the chicken (this recipe serves 2).
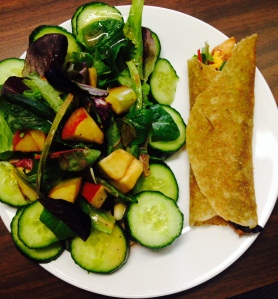
I love wraps – veggie wraps stuffed with fresh spinach and crisp peppers, topped with avocado and shredded cheese, or Thai chicken wraps with cheese and fresh veggies… or even ground chicken soft shell tacos with homemade taco seasoning, Jalapeno peppers, onions, salsa, and shredded cheese. I just love them.. I could very well have them every day for lunch without a complaint. However, fun fact, I NEVER buy tortilla wraps. I make them, from scratch. It’s actually relatively easy, especially if you have a stand mixer and a dough hook. You will need*:
- 2 cups of whole wheat flour
- 1/2 cup of unbleached all purpose flour
- 1 tsp of salt
- 1/2 cup oil
- 1 cup of hot water
- Add flours and salt into the bowl of your stand mixer. Sift to combine. Add in the oil and using the dough hook attachment, mix on medium until the flour and oil are well combined, about 3 to 5 minutes. Scrape down the sides as necessary.
- While mixing on medium, gradually add the water until a large ball of dough forms. Again, scrape down the sides as necessary.
- Remove the ball of dough from the bowl and place on a lightly floured surface. Form it into a log that is about 10 inches long. Cut the log into 16 pieces – cut in half width wise, and then cut each of those haves in half, and then each of those in half until you have 8 equally sized pieces, then cut lengthwise.
- Roll each piece into a disk and then place it on a baking sheet or cutting board lined with waxed paper. Cover with plastic wrap and let sit for 20 minutes.
- After 2o minutes, you are ready to roll out your flour tortillas! Roll out each disk, one by one, into a large circle (about 6 to 7 inches in diameter). Place it in a frying panon medium heat (no need for oil) and fry it on each side for about 30 – 45 seconds. Th pan should be hot before placing the wraps in. Place on a plate to cool and enjoy!!
*Eat wraps within one hour or refrigerate. Please visit http://www.100daysofrealfood.com/2010/05/26/recipe-whole-wheat-tortillas/ for more info and how to incorporate more from scratch, real food into your life.
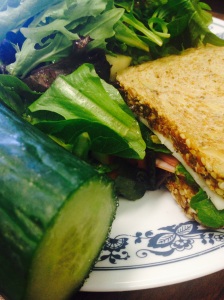
I’ve also been enjoying sandwiches – using Ezekiel bread and Maple Leaf’s no preservatives added lunch meat. But I’ve been thinking… what if I made my own bread? My boyfriend eats store-bought almost everyday for lunch… maybe there’s a way to save money and eliminate preservatives by making my own? So I borrowed a bread maker from a co-worker, and got to work!
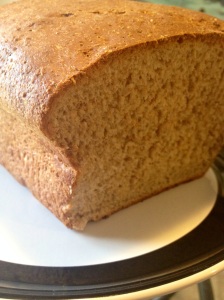
I think my absolute favourite smell in the whole entire world in fresh baked bread. It literally makes my mouth water. On my commute home from work we pass a bakery everyday and the smell of fresh baked yumminess seeps into our car. It’s intoxicating. So, when a co-worker of mine lent me her bread maker, naturally I was over the moon. About an hour in, the poor old bread maker began making an awful clanky sounds-like-it’s-about-to-blow-up sound. And…we it broke. Lukily the first hour was the bread allowing the ingredients to sit and the yeast to activate. I quickly pulled the ball of dough out of the machine, plopped it in a buttered bread pan, and covered it with a clean tea towel for 30 minutes. Once the dough doubled in size, I plopped it in the oven and baked for about 35 minutes. It turned out great!
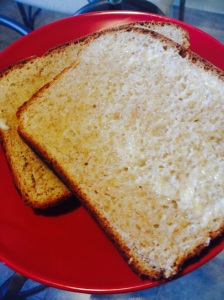
Ken and I each had a piece while it was still warm. It was the best damn bread I ever had! I got the recipe for the bread maker loaf here. The only complaint ken had was that it was quite thick when I cut it (apparently I haven’t yet mastered how to cut the bread in relatively thin slices). But I will continue to practice…and possibly buy an electric knife.
The last thing I want to share is homemade pizza. The crust uses quick rise yeast, so in total it takes only about 40 minutes to make the pizza. For the crust, I used:
- 1 cup whole wheat flour
- 1 cup unbleached all purpose flour
- 1 packet (or 2 1/4 tsp) of quick rise yeast
- 1 tsp of salt
- 1/2 tbsp sugar
- 3/4 cup hot water
- 1 tbsp extra virgin olive oil
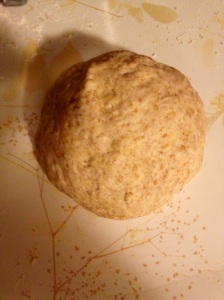
Combine all dry ingredients in a large bowl. Pour in hot water and oil and mix with spoon or hands until you form a large bowl. I found the crust to be very dry at this point, so I plopped it on a clean, dry surface, added a teaspoon of water, and kneaded until the dough formed a large ball free of excess flour or flakes.
Place the dough on a piece of wax paper. Spray a piece of plastic wrap and cover the ball, sprayed side down, for about 20 minutes. While your dough is rising. Preheat the oven to 450 F degrees.
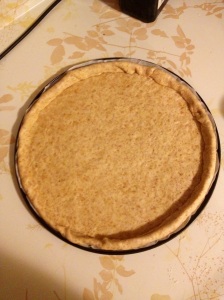
Roll out dough until it is about 12 inched in diameter, being sure to roll it our to a relatively consistent thickness all around. I like my pizza to have a thin crust in the middle, but I like a nice thick crust around the edges, so I place the dough on my 9 inch parchment paper lined pizza sheet and then fold the excess over to make a thick crust. Press the dough into the pizza sheet. I do this to try to even out the thickness.
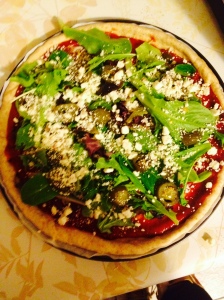
Top the crust with your favourite ingredients. I add sauce, spinach, jalapenos, feta, mozzarella and lean preservative free pepperoni slices.
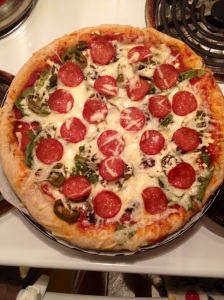
Bake for 15- 18 minutes. I like to bake it a little longer to ensure the middle is crispy.
Now doesn’t that just look like the best pizza ever? And, fun fact, only 215 calories a slice. Pretty wonderful if you ask me. Well that’s it from me for now. Happy Baking!
